Disclaimer
We may earn a commission when you use one of our coupons/links to make a purchase at no extra cost to you. Please support the site by using the links.
Now that the car had some paint on it it wasn’t done yet. The car has only been sprayed and has not been wet flat or buffed up. As the car was already very shiny I was looking forward to seeing what the Porsche was going to look like when Duncan was done with his magic.
Doing some mods to make the car better.
One of the things that as always bothered me was the brake lines to the back. It has never been an issue but one day it could be. The way the lines were originally routed to the back of the car goes through the engine bay. This meant it was very close to the exhaust headers. To close for comfort. Although the headers were ceramic coated I still wanted to do something to fix this possible issue. We had some proper heat shielding material that we used in one of our boat racing projects. This was perfect for the job. I made some shields that I fitted over the area that the headers would be the closest to.


From past experience, I knew this shielding would help allot. This was really the good stuff.
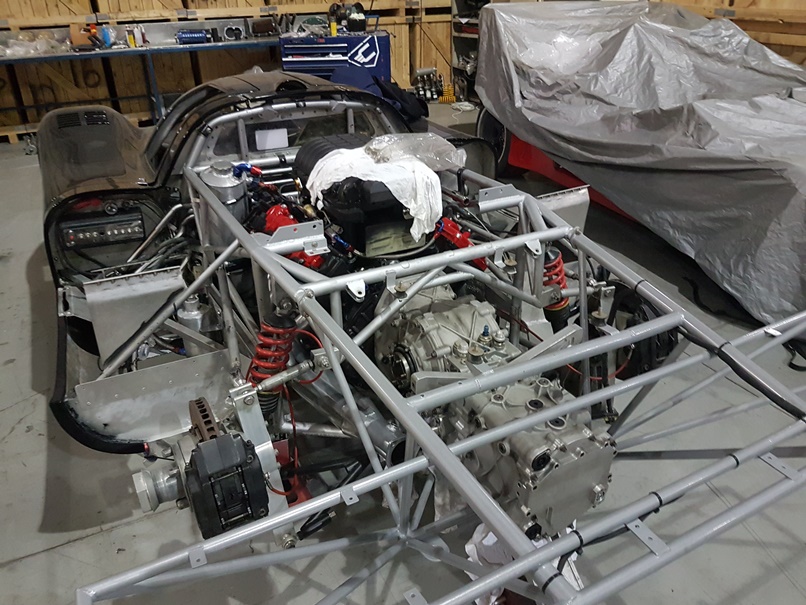
Time for the heart to go in.
After I inspected the engine bay framework, I just gave it a nice cleanup and sprayed the tubing. The engine bay was now ready for the engine. Because of the new oil piping on the engine, the was a lot easier to get the engine into the engine bay.

Because of the accident, the car was in, the one header was cracked. We had to weld up the crack but didn’t know if the exhaust fitment was going to be an issue. Lucky for us the header was just cracked and the header did not bend from the impact.
One of the things that always bothered me was the routing of the charge cooler pipes. They just laid loose in the engine bay. I decided to make a plan with them and rout them nicely with the stainless dairy tube. I would just use the soft lines where I needed to.

All the pipes were working out well. Now it was time for the gearbox to go back in. I have done this so many times that I could almost take the gearbox in and out in my sleep. The flywheel was on and the clutch stud and nut kit were torqued down to spec.

Everything was going slow, but I made certain that if I do something I do it right. I didn’t want to do anything twice because I forgot something. The newly ceramic coated exhaust also went on as a final fit. The build was coming together very nicely.
Time to do wires.
Before spend to much time on connecting all the pipelines to the engine and the battle to connect the looms I spend some time on the wires. I wanted the wiring on the car to almost disappear in the engine bay. This was a really time-consuming job but got it right in the end.
It was also time to redo the gauge cluster. The gear shift indicator was always on the left side of the dash. I wanted the indicator to be on the gauge cluster. I designed a new backplate and got it laser cut.


Everything was working out well, it won’t be long before I could start.


One thought on “917 is coming together nicely!”
Hmm it looks like your site ate my first comment (it was super long) so I guess I’ll just sum it up what I had written and say, I’m thoroughly enjoying your blog. I too am an aspiring blog writer but I’m still new to the whole thing. Do you have any suggestions for inexperienced blog writers? I’d really appreciate it.
Comments are closed.